I used to tell students WAY too much when introducing new concepts in math, and I neglected to let them discover things on their own. When students are told what to think, I believe that it limits understanding. I used to stand up in front of my students and talk about fractions by telling them which ones were halves, thirds, quarters, etc. It is embarrassing to admit that I would teach that way, but now at least I can share what I’ve replaced that method with…lots of inquiry based hands on learning.
Today the learning target was: I can use benchmark fractions to estimate. After spending lots of days in a row with tangible real world concreteness, it was a big leap to move to representational models of fractions. We pulled out the fraction tiles (basically harder versions of fraction strips) that came with our new math series.
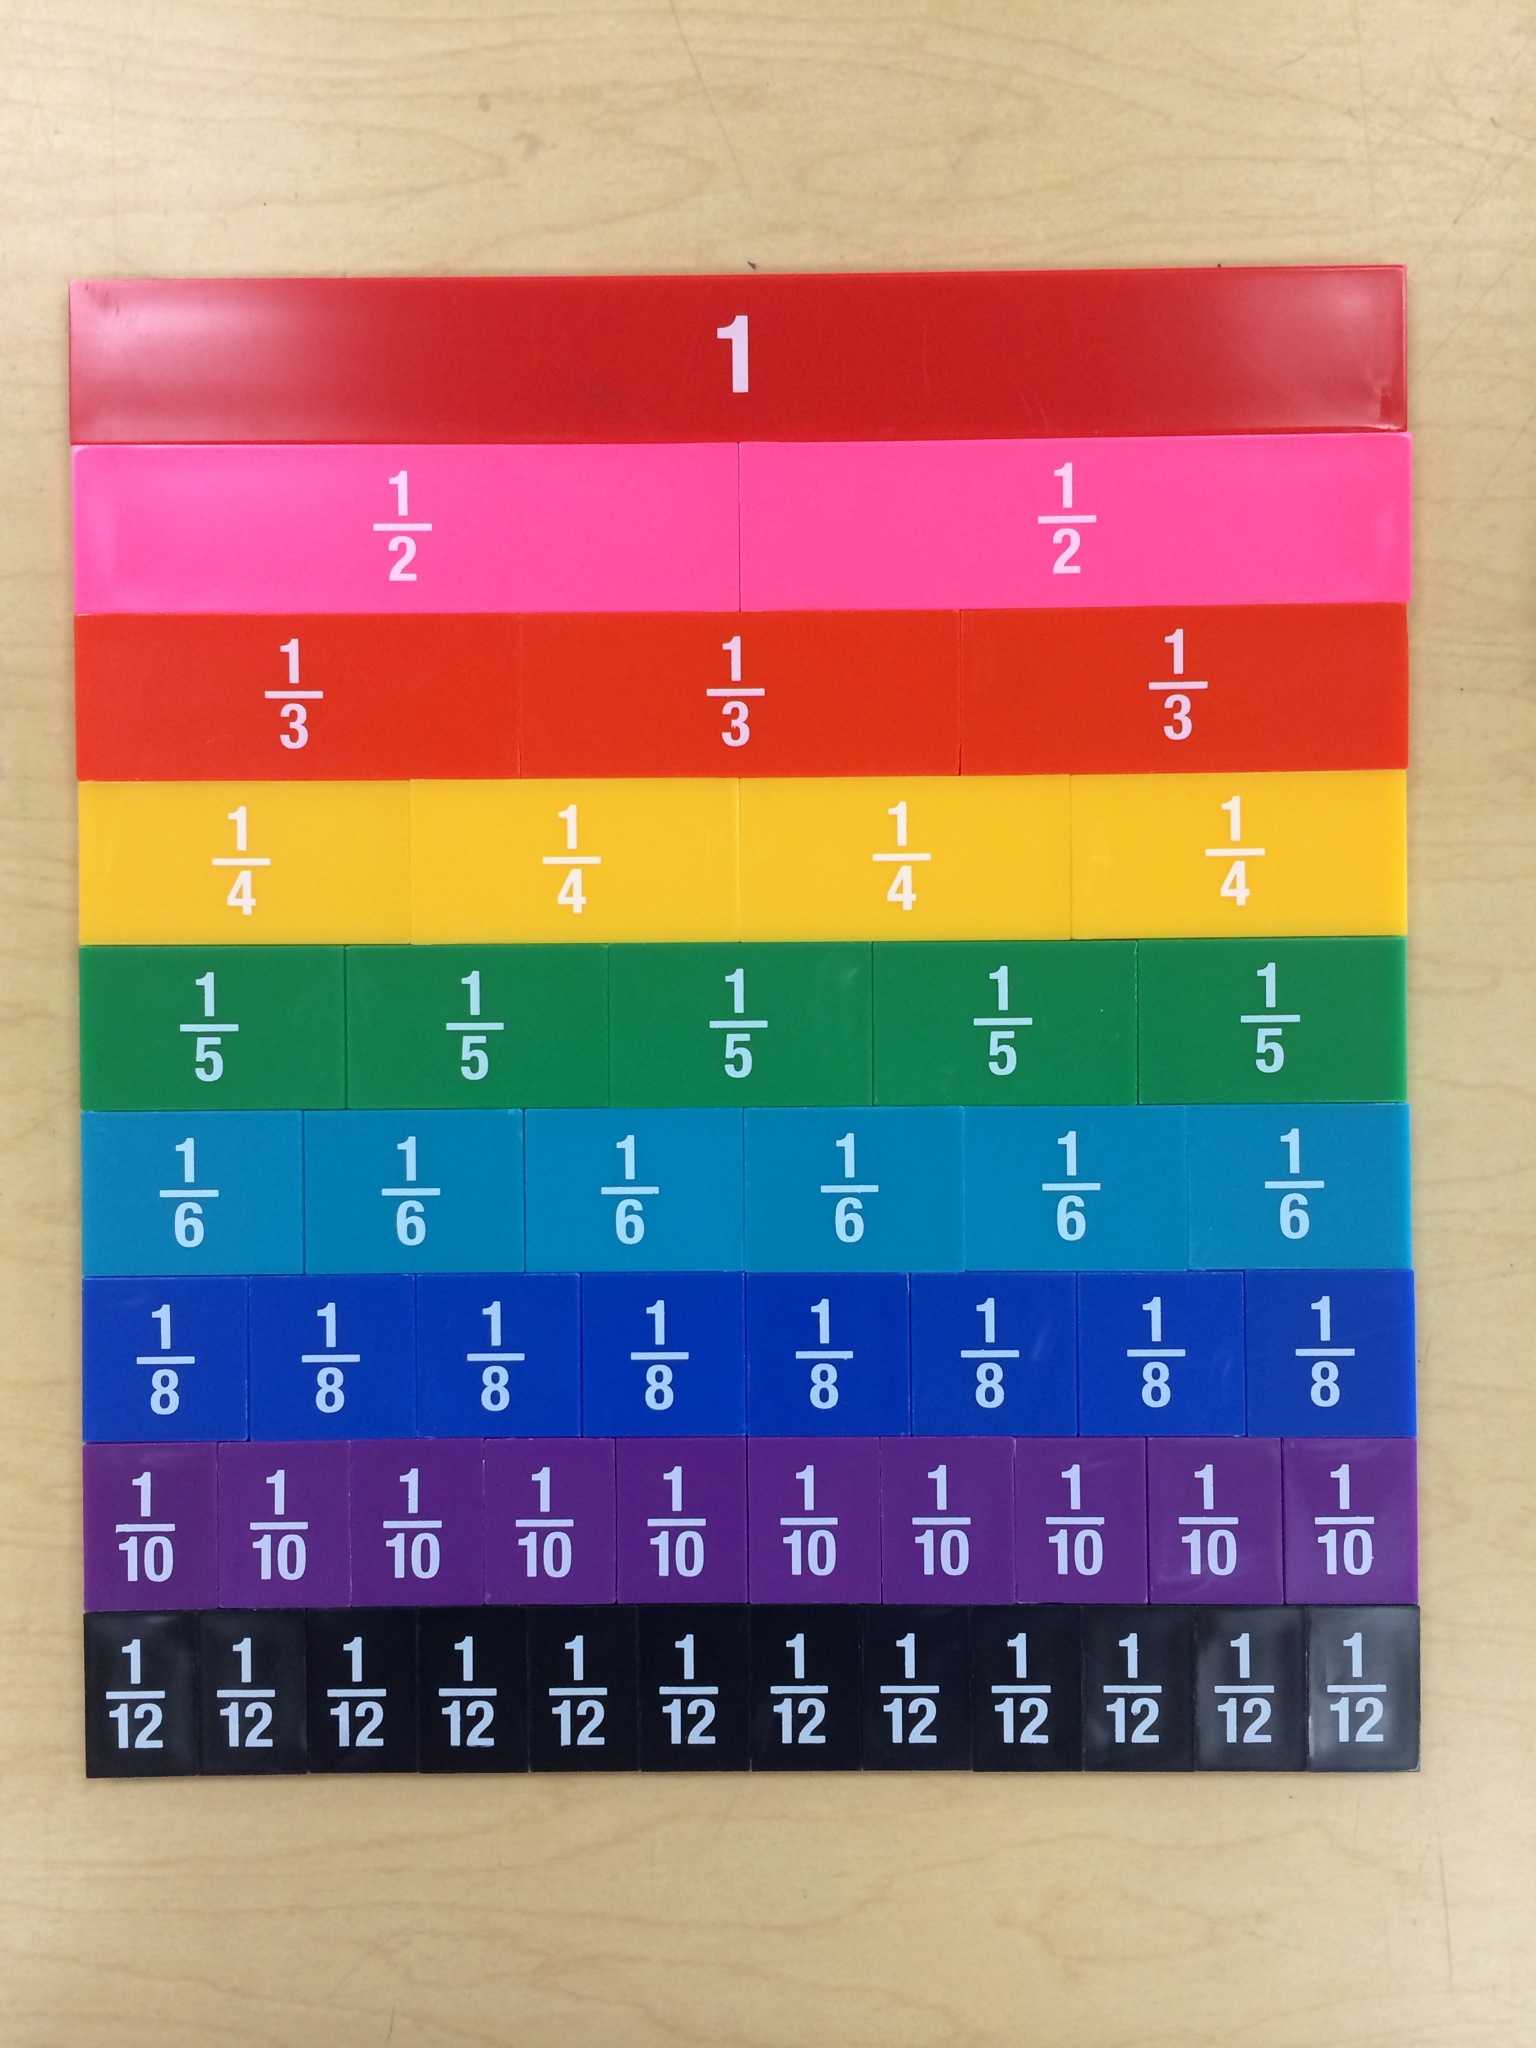
After we took them apart, I had them flip over the entire thing, putting the red whole number 1 at the top. There were a LOT of confused faces, and even one student said “how will we know what they all are?” I asked them to trust me and luckily they do, so they flipped them over. Then, I asked the same question that the student had just asked. How do you know which one is which? Which one is 1/2, 1/4 or 1/3? A few students right away started to lay them on top of the red whole piece like this:

After a little buzzing with their partner, they all pointed to the pink one immediately for 1/2. It took them only a few more minutes to identify the 1/3 and 1/4 sections. When we talked about how they discovered this, there were a couple of cool things they noticed:
- “I just counted, if there were two of one color, I knew it was two halves! If there was three, I knew it was thirds.”
- “I lined them all up below the whole tile to see how many could “fit” in one whole. Sometimes I didn’t need to fill up the whole thing, because I could just tell.” (Boom! Learning target met!)
- “I counted them and stacked them, as I they got smaller, they got taller.” (I really like the size thinking there.)

Giving them time to explore has made fractions way less intimidating. The models came much easier to them when they didn’t have confusing labels staring them in the face. I am definitely a fan of using fraction tiles/strips with the labels hiding. What an awesome way to get them to estimate using benchmark fractions.
Tomorrow, we’ll explore equivalent fractions with these same strips, and try to connect it to the real world. I can’t wait to see their thinking!

Leave a comment